Bootstrap a Web2.5 app quickly with Hasura, Next and Sign-in with Ethereum
So you’ve read about Web2.5 and want to help migrate your users to a more open and community-first platform. Likely you’ll want to bootstrap your project to keep costs down so today I’m going to share how I used Hasura and Next.js to power an awesome UX for users of community-run applications.
Requires
docker&docker-compose(newer versions are bundlingcompose)node,npm(yarnsuggested)
Leveraging some awesome technologies
- Next.js (12+ recommended) - server-side rendering
- Hasura (Cloud or docker) - Automagical GraphQL API on Postgres
- NextAuth - handling authentication providers & sessions for Next
- Sign-in with Ethereum (SIWE) - standard messaging for signing messages with Ethereum wallets
- RainbowKit - handles wallet providers & chains
- Wagmi hooks - all hooks needed to use Ethereum wallets
- Nx - monorepo management suite
- Chakra - super simple component set & theme
You can jump ahead to the reference repo: scottrepreneur/next-hasura-siwe
Caution
Web2.5 apps are mostly appropriate for community-centered apps not for apps that are looking for massive scale. If censorship-resistance or trustlessness guarantees are necessary, you’ll want to look at storage that is less centralized. Check out my upcoming post about adoption via web2.5.
Updates
After launching the initial version of the template there has been some improvements to RainbowKit and the patterns used in the template generally. The clean up has been made here and the extension to the template is included in another follow-up post.
Getting started
First we’ll initialize a new Nx repo with a Next.js app inside.
npx create-nx-workspace@latest {APP_NAME}
Setup Hasura
In order to avoid hassle setting up Hasura, we’ll leverage Docker to get running quickly. If you’re referencing the template repo you can copy the .env.example
touch .env
touch docker-compose.yml
Make sure to ignore the environment file
.gitignore
.env
.env.local
We’ll touch on the values in the environment file quickly, though mostly the defaults from the example will get you started.
.env
# What protocol to provide for clients
HASURA_ENDPOINT_PROTOCOL=http
# This can be either IP or hostname(domain)
HASURA_ENDPOINT_IP=localhost
# Sync port with hasura/config.yaml for local development environment
HASURA_ENDPOINT_PORT=8080
# This is the value necessary to work, compiled from the above values
HASURA_ENDPOINT=${HASURA_ENDPOINT_PROTOCOL}://${HASURA_ENDPOINT_IP}:${HASURA_ENDPOINT_PORT}
# Docs for authentication: https://docs.hasura.io/1.0/graphql/manual/auth/authentication/index.html
HASURA_GRAPHQL_ADMIN_SECRET=helloworld
# Docs for logs: https://docs.hasura.io/1.0/graphql/manual/deployment/logging.html
HASURA_GRAPHQL_ENABLED_LOG_TYPES="startup, http-log, webhook-log, websocket-log, query-log"
# Set to "false" to disable console or for manual [migration](https://docs.hasura.io/1.0/graphql/manual/migrations/existing-database.html)
HASURA_GRAPHQL_ENABLE_CONSOLE=true

# Database URL/Host
POSTGRES_ENDPOINT_IP=localhost
# Database Port
POSTGRES_ENDPOINT_PORT=5432
# Database name
POSTGRES_DATABASE=test
# Database username
POSTGRES_USERNAME=root
# Database password
POSTGRES_PASSWORD=toor
# Database timezone
POSTGRES_TIMEZONE=utc
Then we’ll create a docker compose file.
docker-compose.yml
version: "3.7"

services:
  postgres:
    container_name: db
    image: postgres:12-alpine
    restart: always
    environment:
      POSTGRES_DB: ${POSTGRES_DATABASE}
      POSTGRES_USER: ${POSTGRES_USERNAME}
      POSTGRES_PASSWORD: ${POSTGRES_PASSWORD}
      PGTZ: ${POSTGRES_TIMEZONE}
    ports:
      - target: 5432
        published: ${POSTGRES_ENDPOINT_PORT}
        protocol: tcp
        mode: host
    healthcheck:
      test: pg_isready -U "$$POSTGRES_USER" -d "$$POSTGRES_DB"
      interval: 10s
      timeout: 2s
      retries: 10
    volumes:
      ## To executes ['initialization scripts'](https://hub.docker.com/_/postgres),
      ## uncomment the next line, create ./data directory, and add .sh or .sql files under ./data
      # - ./data:/docker-entrypoint-initdb.d
      - postgres_data:/var/lib/postgresql/data
  graphql-engine:
    container_name: hasura
    image: hasura/graphql-engine:latest
    ports:
      - target: 8080
        published: ${HASURA_ENDPOINT_PORT}
        protocol: tcp
        mode: host
    volumes:
      - ./services/hasura/migrations:/hasura-migrations
    depends_on:
      postgres:
        condition: service_healthy
    restart: always
    environment:
      HASURA_GRAPHQL_DATABASE_URL: "postgres://${POSTGRES_USERNAME}:${POSTGRES_PASSWORD}@postgres:5432/${POSTGRES_DATABASE}"
      HASURA_GRAPHQL_ENABLE_CONSOLE: ${HASURA_GRAPHQL_ENABLE_CONSOLE}
      HASURA_GRAPHQL_ENABLED_LOG_TYPES: ${HASURA_GRAPHQL_ENABLED_LOG_TYPES}
      ## uncomment next line to set an admin secret
      # HASURA_GRAPHQL_ADMIN_SECRET: '${HASURA_GRAPHQL_ADMIN_SECRET}'
      ## uncomment to set unauthorized role, requires admin secret ^^^
      HASURA_GRAPHQL_UNAUTHORIZED_ROLE: ${HASURA_GRAPHQL_UNAUTHORIZED_ROLE}
      ## uncomment next line to set JWT secret
      # HASURA_GRAPHQL_JWT_SECRET: '${HASURA_GRAPHQL_JWT_SECRET}'

volumes:
  postgres_data: {}
Next we’ll set up the hasura bootstrap with hasura init in a newly created folder called services. If you don’t have the Hasura CLI get it here. We’ll only do hasura commands from this directory, everything else will be from the root (thanks nx!).
mkdir services && cd services
hasura init
You’ll be able start the services with docker compose up. It’ll pull in the images from the registry and build the containers.
cd ../..
docker compose up -d
Install Deps & Run
If you haven’t gotten to check all the services let’s go ahead and do that first. We started up the database and Hasura in the last step. Then run the hasura console in a new terminal in services/hasura directory. This is not required but gives you access to Hasura’s console that we’ll explore shortly.
To prepare the repo for running the apps we can run yarn in the root to install the dependencies. Finally start the default Next app we built with Nx. We’ll refer to the app name as frontend for simplicity.
yarn install
nx serve {APP_NAME}
I ended up removing the _document.tsx that was giving me issues with the default styling selection (styled-components).
Almost all the app changes we’ll make are in the next app, so from here on out files are created within the apps/frontend directory as the root. Commands are still run at the root of the repo.
Setup Chakra
Next we’ll leverage Chakra for some styled components and simple theming.
yarn add @chakra-ui/react @chakra-ui/icons @emotion/react @emotion/styled framer-motionWrap the body of the app in _app.tsx in a <ChakraProvider> .
import { AppProps } from 'next/app';
import Head from 'next/head';
import { ChakraProvider } from '@chakra-ui/react';

function CustomApp({ Component, pageProps }: AppProps) {
  return (
    <>
      <Head>
        <title>Welcome to next-hasura-siwe!</title>
      </Head>
      <ChakraProvider>
        <main className="app">
          <Component {...pageProps} />
        </main>
      </ChakraProvider>
    </>
  );
}

export default CustomApp;
We’ll take the opportunity to also clean up the styled-components. Remove the styles import from _app.tsx and update index.tsx to be only:
import { Box } from '@chakra-ui/react';

export function Index() {
  return <Box>Hello</Box>;
}

export default Index;
We’ll use some more of these components later when we create a custom RainbowKit Connect button.
Setup Wagmi + RainbowKit
For accessing (potential) contracts and working with wallets we’ll leverage wagmi.sh and RainbowKit. Wagmi provides React hooks for accessing different web3 states regarding a user. RainbowKit provides a slick interface and defaults for handling many different wallets.
yarn add @rainbow-me/rainbowkit wagmi ethersI like to consolidate the web3 pieces to a utils file and import what’s necessary into _app . We’ll deviate a bit from the standard, but bear with. Import and setup the client and chains for the wallets.
utils/web3.ts
import { getDefaultWallets } from '@rainbow-me/rainbowkit';
import { chain, configureChains, createClient } from 'wagmi';
import { publicProvider } from 'wagmi/providers/public';

const { chains, provider } = configureChains(
  [chain.mainnet, chain.polygon, chain.optimism, chain.arbitrum],
  [publicProvider()] // come back and add another provider here
);

export { chains };

export const { connectors } = getDefaultWallets({
  appName: 'Next Hasura SIWE',
  chains,
});

export const wagmiClient = createClient({
  autoConnect: true,
  connectors,
  provider,
});
Then use these utilities to setup your providers in _app
// ADD THE IMPORTS
...
import { RainbowKitProvider } from '@rainbow-me/rainbowkit';
import { WagmiConfig } from 'wagmi';
import { wagmiClient, chains } from '../utils/web3'

import '@rainbow-me/rainbowkit/styles.css';

// LEVERAGE THE PROVIDERS
function CustomApp({ Component, pageProps }: AppProps) {
  return (
    <ChakraProvider>
      <WagmiConfig client={wagmiClient}>
        <RainbowKitProvider chains={chains}>
          <main className="app">
            <Component {...pageProps} />
          </main>
        </RainbowKitProvider>
      </WagmiConfig>
    </ChakraProvider>
  );
};
Then drop a slightly customized <ConnectButton /> on to index.tsx to make sure we’re still in good shape. We’ll customize this later.
import { Box } from '@chakra-ui/react';
import { ConnectButton } from '@rainbow-me/rainbowkit';

export function Index() {
  return (
    <Box>
      <ConnectButton chainStatus='none' showBalance={false} />
    </Box>
  );
}

export default Index;
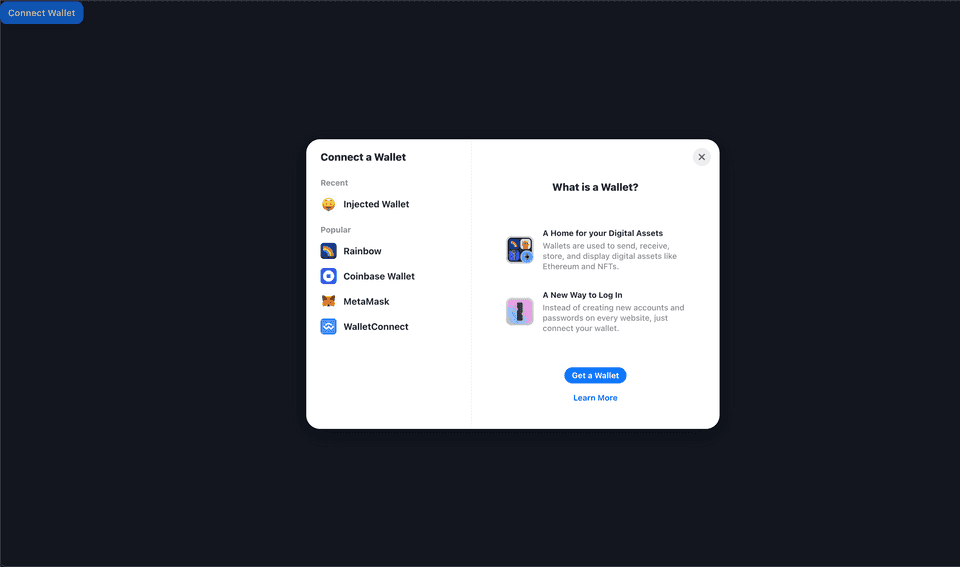
Spin everything up again or hot reload and you should be seeing the wallet modal.
Hasura Crash Course
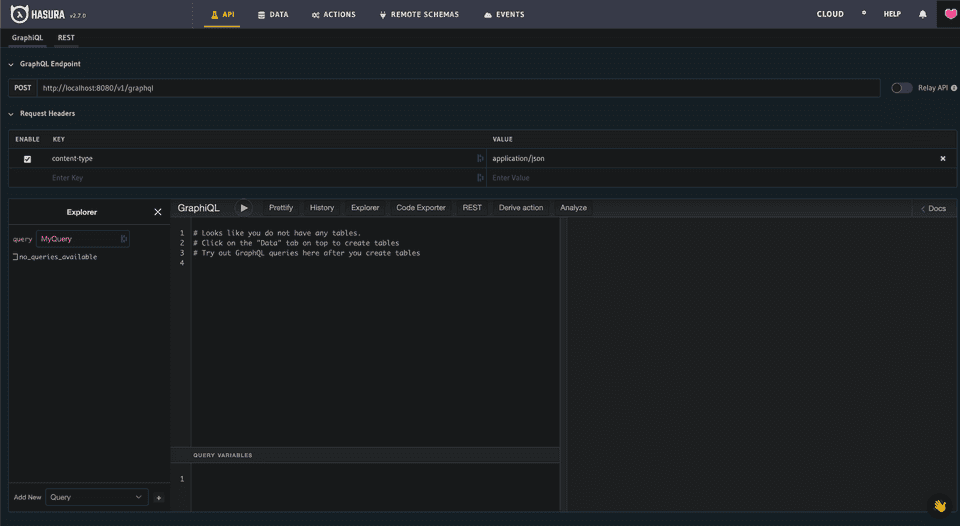
There are much more in depth resources for exploring Hasura but a quick 101 might be useful for the sake of getting things running and tested. The default page of the console is the GraphQL interactive explorer (aka GraphiQL). You can use this to test out the GQL queries, mutations, and API permissions. On the bottom left, hasura will peer into your db and give you the queries available.
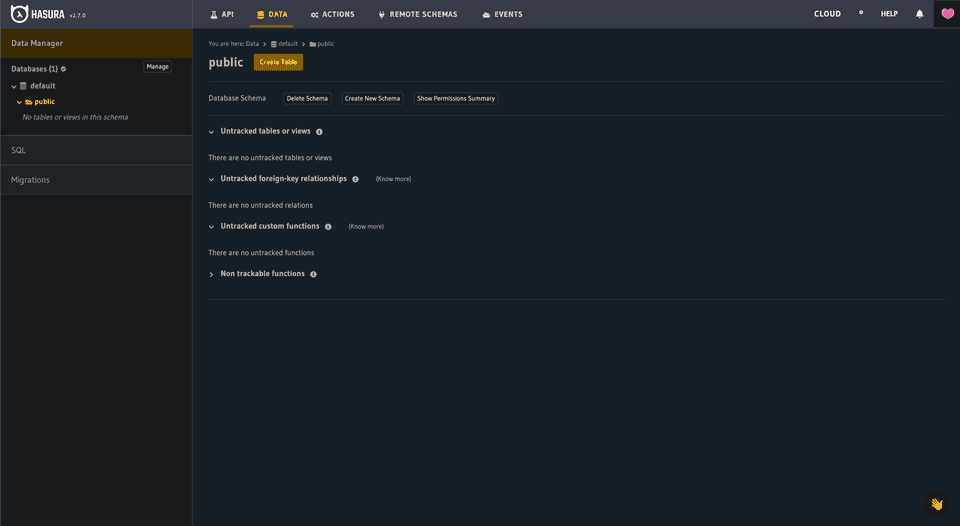
On the data tab you can explore the database, collections, modify data, update permissions and run migrations. While you can make changes to the data via the console, it’s best to run them via SQL so they’re recorded for others building the DB from scratch.
These are the main pages you’ll use in the console. You can dive into Actions and learn more about leveraging other endpoints within Hasura’s API. For the CLI we can use some commands to bootsrap our db in the future. Let’s do it live since we’ll need a user model for authentication later.
First we’ll create a migration to be run against the DB (in services/hasura for hasura commands).
hasura migrate create init_schemaThis creates a couple new files in the migrations/default directory for the database. Aptly named the up is for creating changes in the db and down is for tearing down changes. Usually the down is the inverse of the up, but likely you won’t need down so we can delete it.
up.sql
CREATE TABLE public.users (
    id uuid DEFAULT public.gen_random_uuid() NOT NULL,
    address text NOT NULL,
    created_at timestamp with time zone DEFAULT now() NOT NULL
);
*This model is overly simple but gets us rolling with authentication. *If you need help generating SQL check out a tool like dbdiagram.io for getting you started.
So we’ll create a table in the database named users adding 3 columns to it: id is a generated random id, address is a string/text created_at is a timestamp that is set to now. All of the fields are required, with created_at having a default.
We can run this migration with the CLI command.
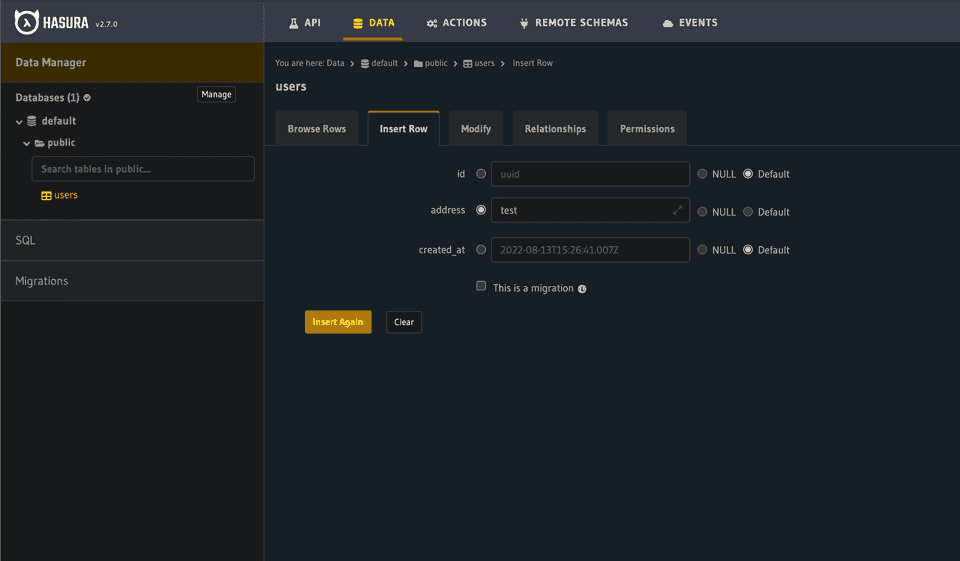
hasura migrate applyOnce you run the migration you can refresh the console on the Data tab and look for a new database table to track under “Untracked tables or views”. Select *Track *to add it to the Hasura GQL schema. This will automatically update your metadata so you’ll see some more changes in your git directory. To get you through the rest of the Hasura flows, let’s create a test record. Go to the Insert Row Tab and create a record with an “address” of “test”. There’s no validation currently on this field and we’ll delete it later (Try adding validation in your version of the SQL above!). Hit Insert.
To complete the backup & restore process we can update seeds and metadata. Make sure the metadata is up to date when you commit to your git history.
hasura metadata exportThough you shouldn’t use this for large amounts of data or anything sensitive, you can create a snapshot of the database that will get other folks started quicker looking at more “real” data.
# hasura seeds create {SEEDS_NAME} --disable-interactive --from-table {TABLE_NAME} --database-name {DATABASE_NAME}
hasura seeds create init_users --disable-interactive --from-table users --database-name default
When you bootstrap a new dev or instance (just delete the db), you’ll run these commands to get running with the seed data quickly.
# clone repo
# docker compose up -d && cd services/hasura
hasura migrate apply
hasura metadata apply
hasura seeds apply
Learn more about managing local dev with a Hasura Cloud instance here. Before you deploy everything, check out the Production Checklist.
Setup NextAuth & Sign-In with Ethereum
To allow our API to be protected so only known users (and only subsets folks you choose) can see and interact with the underlying app and data. NextAuth is a powerful library that’ll help us setup Sign-in with Ethereum as a sign-in/up option. Get started by installing next-auth & siwe .
yarn add next-auth siwe @rainbow-me/rainbowkit-siwe-next-authNext we can figure the <SessionProvider> so session data is available throughout the _app .
...
import { SessionProvider } from 'next-auth/react';
...

function CustomApp({
  Component,
  pageProps: { session, ...pageProps },
}: AppProps) {
  return (
    <>
      ...
      <SessionProvider refetchInterval={0} session={pageProps.session}>
        <RainbowKitSiweNextAuthProvider>
          {...}
        </RainbowKitSiweNextAuthProvider>
      </SessionProvider>
    </>
  );
}
We can add a couple environment variables to a fresh environment file for this app specifically. Next will pick this up by default when named .env.local
# Tells Next where to hit the Hasura API
NEXT_PUBLIC_API_URL='http://localhost:8080/v1/graphql'
# Admin key for the console or API requests, leave blank for localhost
HASURA_GRAPHQL_ADMIN_SECRET=supersecret
# Tells NextAuth where to authenticate the API
NEXTAUTH_URL=http://localhost:4200
# Secret hash used for encoding JWTs
NEXTAUTH_SECRET=supersecret
Then we’ll create an API endpoint to handle the NextAuth endpoints. Add a new file inside a new api folder in pages . We’ll add the provider scaffold from the SIWE example.
pages/api/[...nextauth].ts
import NextAuth from "next-auth"
import CredentialsProvider from "next-auth/providers/credentials"
import { getCsrfToken } from "next-auth/react"
import { SiweMessage } from "siwe"

// For more information on each option (and a full list of options) go to
// https://next-auth.js.org/configuration/options
export default async function auth(req: any, res: any) {
  const providers = [
    CredentialsProvider({
      name: "Ethereum",
      credentials: {
        message: {
          label: "Message",
          type: "text",
          placeholder: "0x0",
        },
        signature: {
          label: "Signature",
          type: "text",
          placeholder: "0x0",
        },
      },
      async authorize(credentials) {
        try {
          const siwe = new SiweMessage(JSON.parse(credentials?.message || "{}"))
          const nextAuthUrl = new URL(process.env.NEXTAUTH_URL)

          const result = await siwe.verify({
            signature: credentials?.signature || "",
            domain: nextAuthUrl.host,
            nonce: await getCsrfToken({ req }),
          })

          if (result.success) {
            return {
              id: siwe.address,
            }
          }
          return null
        } catch (e) {
          return null
        }
      },
    }),
  ]

  const isDefaultSigninPage =
    req.method === "GET" && req.query.nextauth.includes("signin")

  // Hide Sign-In with Ethereum from default sign page
  if (isDefaultSigninPage) {
    providers.pop()
  }

  return await NextAuth(req, res, {
    // https://next-auth.js.org/configuration/providers/oauth
    providers,
    session: {
      strategy: "jwt",
    },
    secret: process.env.NEXTAUTH_SECRET,
    callbacks: {
      async session({ session, token }: { session: any; token: any }) {
        session.address = token.sub
        session.user.name = token.sub
        session.user.image = "https://www.fillmurray.com/128/128"
        return session
      },
    },
  })
}
Update: The RainbowKit NextAuth plug-in handles what we were manually doing here. Simply pass in the default Connect Button with the provider to handle authentication with the connection.
import { Flex } from '@chakra-ui/react';
import { ConnectButton } from '@rainbow-me/rainbowkit';

export function Index() {

  return (
    <Flex
      w='100%'
      h='100%'
      minH={['500px', null, null, '1000px']}
      align='center'
      justify='center'
    >
      <ConnectButton chainStatus='none' showBalance={false} />
    </Flex>
  );
}

export default Index;
Once you’re running here you can move on to the last step of adding Hasura to NextAuth and customizing the RainbowKit button.
Customize Connect Button
Customizing the Connect button will allow the application to handle the several connected:signedIn scenarios gracefully. We could auto prompt sign-in immediately (you may want to! *bonus at the end*), but this is a bit more flexible. There’s a lot going on here, but most of it is Chakra-adapted version of the RainbowKit Custom Connect Button.
components/ConnectButton.tsx
import React from 'react';
import { ConnectButton as RainbowConnectButton } from '@rainbow-me/rainbowkit';
import {
  Button,
  Flex,
  Menu,
  MenuButton,
  MenuList,
  MenuItem,
  Icon,
  HStack,
  Heading,
  Box,
  useMediaQuery,
} from '@chakra-ui/react';
import { FaChevronDown } from 'react-icons/fa';
import Image from 'next/image';
import { useAccount, useEnsName, useDisconnect, useEnsAvatar } from 'wagmi';

const ConnectButton = () => {
  const { address } = useAccount();
  const { disconnect } = useDisconnect();
  const { data: ensName } = useEnsName({ address });
  const { data: ensAvatar } = useEnsAvatar({ address });

  const blockie = null; // TODO implement blockie or other solution
  const [upTo780] = useMediaQuery('(max-width: 780px)');

  return (
    <RainbowConnectButton.Custom>
      {({
        account,
        chain,
        openAccountModal,
        openChainModal,
        openConnectModal,
        mounted,
        authenticationStatus,
      }) => {
        const ready = mounted && authenticationStatus !== 'loading';
        const connected =
          ready &&
          account &&
          chain &&
          (!authenticationStatus || authenticationStatus === 'authenticated');

        return (
          <div
            {...(!ready && {
              'aria-hidden': true,
              style: {
                opacity: 0,
                pointerEvents: 'none',
                userSelect: 'none',
              },
            })}
          >
            {(() => {
              if (!connected) {
                return (
                  <Button onClick={openConnectModal} variant='outline'>
                    Connect Wallet
                  </Button>
                );
              }

              if (chain.unsupported) {
                return (
                  <Button onClick={openChainModal} type='button'>
                    Wrong network
                  </Button>
                );
              }

              return (
                <Flex gap={2}>
                  <Button
                    onClick={openChainModal}
                    display='flex'
                    alignItems='center'
                  >
                    {chain.hasIcon && chain.iconUrl && (
                      <Image
                        alt={chain.name ?? 'Chain icon'}
                        src={chain.iconUrl}
                        width={25}
                        height={25}
                      />
                    )}
                  </Button>

                  <Menu placement='bottom-end'>
                    <MenuButton
                      as={Button}
                      rightIcon={<Icon as={FaChevronDown} />}
                    >
                      <HStack spacing={2} align='center'>
                        {(ensAvatar || blockie) && !upTo780 && (
                          <Box
                            height='25px'
                            width='25px'
                            borderRadius='50%'
                            overflow='hidden'
                          >
                            <Image
                              src={ensAvatar || blockie}
                              alt='User Avatar'
                              height='25px'
                              width='25px'
                            />
                          </Box>
                        )}

                        <Heading size='sm'>
                          {ensName || account.displayName}
                        </Heading>
                      </HStack>
                    </MenuButton>
                    <MenuList>
                      <MenuItem onClick={openAccountModal}>Wallet</MenuItem>
                      <MenuItem onClick={() => disconnect()}>Sign Out</MenuItem>
                    </MenuList>
                  </Menu>
                </Flex>
              );
            })()}
          </div>
        );
      }}
    </RainbowConnectButton.Custom>
  );
};

export default ConnectButton;
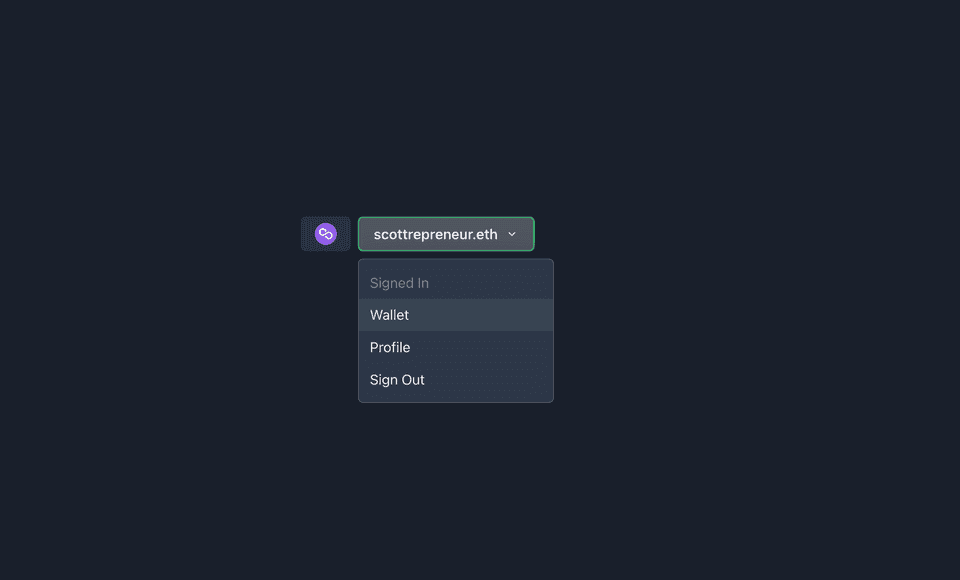
This gives us unified control of the menu and wallet after sign-in with some subtle indication of the current status.
Connect to Hasura
We’ll need to call the Hasura API with a GraphQL client. Here we’ll use Apollo, though others are great options here as well. Let’s add Apollo and a JWT library.
yarn add @apollo/client graphql jsonwebtokenWe’ll combine the client and query here for simplicity.
utils/gql/client.ts
import { gql, GraphQLClient } from 'graphql-request';

const API_URL = process.env.NEXT_PUBLIC_API_URL;

type ClientParams = {
  token?: string;
  userId?: string;
};

export const client = ({ token, userId }: ClientParams) => {
  const headers = { authorization: null };

  if (token) {
    headers.authorization = `Bearer ${token}`;

  } else {
    headers['x-hasura-admin-secret'] = process.env.HASURA_GRAPHQL_ADMIN_SECRET;
  }

  return new GraphQLClient(API_URL, { headers });
};

export const USER_DETAIL_BY_ADDRESS_QUERY = gql`
  query userLookup($address: String) {
    users(where: { address: { _eq: $address } }) {
      id
      address
    }
  }
`;

export const USER_CREATE_MUTATION = gql`
  mutation createUser($address: String) {
    insert_users(objects: { address: $address }) {
      returning {
        id
        address
      }
    }
  }
`;
Then we can use that to update our [...nextauth].ts
- We’ll extend the
jwtencode and decode functions - Lookup the user by address or create a new user
- Encode the token into a format the Hasura likes
pages/api/[...nextauth].ts
import NextAuth from 'next-auth';
import CredentialsProvider from 'next-auth/providers/credentials';
import { NextApiRequest, NextApiResponse } from 'next';
import {
  siweCredentials,
  authorizeSiweMessage,
  extendSessionWithUserAndToken,
  encodeAuth,
  decodeAuth,
  CONFIG,
} from '../../../utils/auth';

const NEXTAUTH_SECRET = process.env.NEXTAUTH_SECRET;

type NextAuthOptions = Parameters<typeof NextAuth>[2];

const siweProvider = CredentialsProvider({
  name: 'Ethereum',
  credentials: siweCredentials,
  authorize: (credentials, req: NextApiRequest) =>
    authorizeSiweMessage({ credentials, req }),
});

const Auth = async (req: NextApiRequest, res: NextApiResponse) => {
  const options: NextAuthOptions = {
    providers: [siweProvider],
    session: { strategy: 'jwt', maxAge: CONFIG.defaultMaxAge },
    jwt: { secret: NEXTAUTH_SECRET, encode: encodeAuth, decode: decodeAuth },
    callbacks: { session: extendSessionWithUserAndToken },
  };

  return await NextAuth(req, res, options);
};

export default Auth;
Update: We’ve refactored a lot of this example code from the NextAuth/RainbowKit documentations.
The previous iteration handled everything inline for [...nextauth].ts but we’ve broken some of the functions being imported now to separate utility files to keep our functions small.
utils/auth/siwe.ts
import _ from 'lodash';
import { getCsrfToken } from 'next-auth/react';
import { SiweMessage } from 'siwe';
import {
  SiweAuthorizeParams,
  SiweMessageAuthorizeParams,
  SiweCredentialParams,
} from '../../types';

const NEXTAUTH_URL = process.env.NEXTAUTH_URL;

const defaultCredential = { type: 'text', placeholder: '0x0' };

export const siweCredentials = {
  message: { label: 'Message', ...defaultCredential },
  signature: { label: 'Signature', ...defaultCredential },
};

const parseCredentials = ({ credentials, req }: SiweAuthorizeParams) => {
  const siwe = new SiweMessage(JSON.parse(_.get(credentials, 'message', '{}')));
  return Promise.resolve({ siwe, credentials, req });
};

const checkNonce = async ({
  siwe,
  credentials,
  req,
}: SiweMessageAuthorizeParams) => {
  return getCsrfToken({ req }).then((nonce: string) => {
    if (!_.eq(_.get(siwe, 'nonce'), nonce)) {
      return Promise.reject({ error: 'Invalid nonce' });
    }
    return Promise.resolve({ siwe, credentials, req });
  });
};

const checkDomain = ({
  siwe,
  credentials,
}: SiweCredentialParams): Promise<SiweCredentialParams> => {
  if (!NEXTAUTH_URL) {
    return Promise.reject({ error: 'Invalid domain' });
  }
  if (!_.eq(_.get(siwe, 'domain'), new URL(NEXTAUTH_URL).host)) {
    return Promise.reject({ error: 'Invalid domain' });
  }
  return Promise.resolve({ siwe, credentials });
};

const checkSignature = ({
  siwe,
  credentials,
}: SiweCredentialParams): Promise<SiweCredentialParams> =>
  siwe
    .validate(_.get(credentials, 'signature', ''))
    .then(() => Promise.resolve({ siwe, credentials }))
    .catch((error: Error) => {
      console.log(error);
      return Promise.reject({ error: 'Invalid signature' });
    });

export const authorizeSiweMessage = (
  data: SiweAuthorizeParams
): Promise<{ id?: string } | { error: string }> =>
  parseCredentials(data)
    .then((data) => checkNonce(data))
    .then((data) => checkDomain(data))
    .then((data) => checkSignature(data))
    .then(({ siwe }) => {
      return { id: _.toLower(_.get(siwe, 'address')) };
    })
    .catch((e) => {
      console.log(e);
      return { error: 'Invalid credentials' };
    });
utils/auth/token.ts
import _ from 'lodash';
import jwt from 'jsonwebtoken';
import { JWT, JWTDecodeParams } from 'next-auth/jwt';
import { Session } from 'next-auth';
import { CreateTokenParams, HasuraAuthToken } from '../../types';
import { getOrCreateUser } from './queryHelpers';

const NEXTAUTH_SECRET = process.env.NEXTAUTH_SECRET;

export const CONFIG = {
  encodingAlgorithm: 'HS256',
  defaultRoles: ['public'], // match HASURA_GRAPHQL_UNAUTHORIZED_ROLE
  defaultMaxAge: 30 * 60, // 30 minutes
};

// Could be swapped for different API models
export const createToken = ({
  user,
  token,
  maxAge,
  roles,
}: CreateTokenParams): HasuraAuthToken => ({
  ...token,
  address: _.get(token, 'sub'),
  iat: Math.floor(Date.now() / 1000),
  exp: Math.floor(Date.now() / 1000) + (maxAge ?? CONFIG.defaultMaxAge),
  'https://hasura.io/jwt/claims': {
    'x-hasura-allowed-roles': roles ?? CONFIG.defaultRoles,
    'x-hasura-default-role': _.first(roles ?? CONFIG.defaultRoles),
    'x-hasura-role': _.first(roles ?? CONFIG.defaultRoles),
    'x-hasura-user-id': _.get(token, 'sub'),
  },
});

export const encodeToken = (token: object) =>
  jwt.sign(token, NEXTAUTH_SECRET, { algorithm: CONFIG.encodingAlgorithm });

export const encodeAuth = async ({
  token,
  maxAge,
}: {
  token?: HasuraAuthToken;
  maxAge?: number;
}) => {
  if (_.get(token, 'exp')) return encodeToken(token);

  const user = await getOrCreateUser(_.get(token, 'sub'));

  return encodeToken(createToken({ user, token, maxAge }));
};

export const decodeToken = (token: string) =>
  jwt.verify(token, NEXTAUTH_SECRET, {
    algorithms: [CONFIG.encodingAlgorithm],
  });

export const decodeAuth = async ({ token }: JWTDecodeParams) =>
  decodeToken(token);

export const extendSessionWithUserAndToken = ({
  session,
  token,
}: {
  session: Session;
  token: JWT;
}): Session => ({
  ...session,
  user: {
    address: _.get(token, 'sub'),
  },
  token: encodeToken(token),
});
Fetch from Hasura
Update: The extended implementation for the frontend queries and mutations can be found in the follow-up post here.
Now that we’re authenticated with Hasura via the JWT we can pass the API our queries and mutations with authentication. Since we saved the token in the session object we can grab it from here to pass to Hasura. We definitely want to use minimum viable permissions and expire the tokens frequently to ensure they expire quickly if they fall into the wrong hands.
We wont implement them here, but the client function above in utils/graphql.ts also accepts an optional parameter for the user’s token. Fetch the value from session data and pass it to the client function.
import { useSession } from 'next-auth';

export function Index() {
  const { data: session } = useSession();

  console.log(await client(session.token).query({ query }).variables(variables));
};
If you want to fetch something while rendering on the server you can use getSession for this.
export function getServerSideProps(context) {
  const session = await getSession(context);
  const result = await client(session.token).query({ query });
};
Although the page doesn’t change much, you can ouput the session varible to see your current user session. If things are working well it should’ve created a user record for you on the initial request.
That’s it! You’ve made it and are properly authenticating sessions for users. Now you can use this to provide some private functionality while allowing for some public functionality as well. Next you’ll have to figure out how to give users escalated permissions (check out the bonuses).
Bonus
Auto Sign-In on Connect
This one is pretty straightforward, but you can add a useAccount hook to a top-level page like _app.tsx and catch onConnect and onDisconnect. Read more about this hook in the documentation.
export function Index() {
  const { address } = useAccount({
	onConnect: () => {
		// loginUser()
    },
	onDisconnect: () => {
        // signOut()
    },
  })
};
Secure API endpoints with a Session
In your Next API routes theres a method to check the current request for a session. Read more about it from NextAuth.
import { unstable_getServerSession } from "next-auth/next";
import { authOptions } from "./auth/[...nextauth]";

export default async (req, res) => {
  const session = await unstable_getServerSession(req, res, authOptions)
  if (session) {
    res.send({
      content:
        "This is protected content. You can access this content because you are signed in.",
    })
  } else {
    res.send({
      error: "You must be sign in to view the protected content on this page.",
    })
  }
};
Role-based Authentication inside Hasura
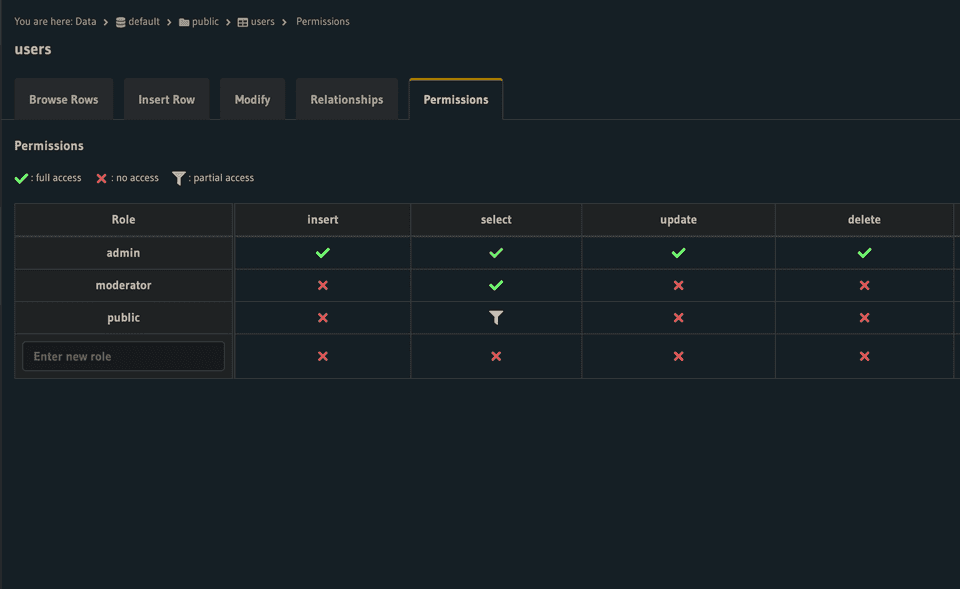
To go deep on the authentication would be too much for this post but is likely worth exploring in the future. You can customize the permissions for models and assign them to roles. I’ve made this work by using an additional roles and user_roles table. Where roles is simply a name and id for each role and user_roles is a mapping between users and roles .
Once that is set you can add this to your lookup query and update the claims.
// expanded query to look up the user's role at `user_roles.rolesByRole.role`
export const userLookupQuery = gql`
  query userLookup($address: String) {
    users(where: { address: { _eq: $address } }) {
      id
      address
      user_roles {
        roleByRole {
          role
        }
      }
    }
  }
`;

// add the roles to the JWT claims
'https://hasura.io/jwt/claims': {
  'x-hasura-allowed-roles': ['public'], // ...otherRoles],
  'x-hasura-default-role': 'public', // "highest" role for the user
  'x-hasura-role': 'public', // "current" role for the user, I've used the same as `default-role`
  'x-hasura-user-id': userId,
},
From the Data tab in the Hasura console you can assign roles specific permissions for each model action. These can even encompass multiple roles with Inherited Roles. Read more about Roles & Sessions here.
Thanks a lot for sticking through it on this one. Hope you were able to get started on your next app with web3 auth. Let me know if you have any ideas to improve the template or post on Twitter (@scottrepreneur_). Thanks a lot to JP for reviewing.
Cheers.

Comments
Loading comments...